Showing posts with label Holidaze. Show all posts

Tuesday, July 1, 2014

Artworks: DIY Mini Piñatas!


Yesterday, we crafted one of our most favorite summer bucket list items yet: mini piñatas. Mom loved them because they used up some of the party supplies taking over our house. We loved them because we got to eat gummy bunnies, which mom pretty much considers candy and dispenses sparingly. Win-win.

We basically followed One Charming Party's tutorial, subbing some of the party supplies we already had on hand. The first one took a bit of finagling, but once you get the hang of it, they come right together. They'd be so, so cute for a birthday party or in red, white + blue at a July 4th BBQ as a "firecracker" piñata. Happy Summer Bucket listing, everyone!

To make our mini piñatas, pull together :
- paper party cups (we used polka dot because that's what we had -- white or another solid colors would give you a more professional look, if you're going for that);
- fringed streamers (we had some pre-fringed leftover garland from another party, so we used that. if we were doing it from scratch, mom would likely cut the streamer in half lengthwise first. it's easier to layer shorter fringed pieces);
- cardstock, cut into 2" circles and hole-punched twice (see photos below);
- string or twine;
- glue;
- a hammer and small nail;
- 5" square or circle of tissue paper; and
- treats! 


1. Having a parent help you, make two small holes in the bottom of the cup with your hammer and nail. Loop a small strand of string through the two holes, tying the ends together inside the bottom of the cup. 


2. Fill cup with treats. Take a 2 foot-long piece of string and loop it through the 2" cardstock circle, and tie string flush against it. Place cardstock on top of your treats, with string ends tailing out the top. 


3. Make small hole in middle of 5" square/circle of tissue paper. Run the ends of cardstock-tied string through it and out the top of the cup. Place a small amount of glue around outside top of cup, fold tissue paper over the sides, gluing down as you go. Let dry for a few minutes.


4. Glue fringe on in layers, starting from the tissue paper covered end of the cup. The more you overlap the fringe, the more coverage you'll get. We could only be patient enough for 3-4 layers. What can we say? We wanted the gummies! 


5. When it's party time, tie piñatas up or have a friend hold one. Gently pull on bottom string and ENJOY!!!

{you can re-use the pinatas by adding more treats, replacing cardstock circle, and taping up the bottom tissue paper a bit}


Thursday, June 12, 2014

Artworks: DIY Tattoo Card


We wanted to think of something really different to tell our daddy how much we love him this Father's Day. Mom suggested hitting one of our Summer Bucket List activities as the same time: DIY Tattoos. Sort of a tongue-in-cheek way of letting dad know how happy we are to be "stuck with him." Mom asked us all of our favorite things about dad and then turned most of those things into a "tattoo" design. Using inkjet printer tattoo paper, she then printed out the images, cut them out, and taped them into a little booklet card. She wrote in a few lines of leading text and BAM, DIY Tattoo Card for Father's Day (yes, the text is backwards on the card, but reading backwards is one of daddy's special gifts). We can't wait to see our ink on daddy!

It's actually a pretty simple project, but it doesn't have to be limited to Father's Day -- you could make tattoos for any occasion or for none at all!

Here's how we did it -- you'll need:
  • printable tattoo paper (mom used the Silhouette brand, which you don't need a fancy Silhouette machine to use, btw); 
  • black card stock; 
  • a metallic pen;
  • tattoo images (you can design your own or find them around the internet -- just make sure to "mirror" the image before you print!);
  • a stapler; 
  • a scraper or credit card (to flatten out air bubbles in the tattoo paper); and
  • washi tape.


1. Fold and Staple Card -- figure out how many pieces of cardstock you need to make your card -- we had 9 tattoos, so we needed 3 pieces of cardstock. Fold each piece of cardstock in half and then fit them one inside of the other to make a book. Staple the edges together.


2. Design Images or Find Pre-made Online -- if you can download a font, you can very easily make your own tattoos. There are plenty that have designs and/or are lettered in a tattoo font. You can click here to find some free ones for download.


3. Print Images + Adhere Sticky Paper -- make sure you mirror whatever image you're printing so it goes on the correct way once applied. The Silhouette paper requires you to print the image first, then adhere the "sticky" layer to it. Starting in one corner, peel off the sticky paper backing and smooth it over the images. Use a scraper or credit card to smooth out any air bubbles. It's not the easiest thing to do and mom ended up with some creases -- hopefully they come out OK!


4. Cut Out Tattoos, Tape In Card + Add Text -- mom used ours to tell a story to daddy of all the things we love about him most. You can obviously do whatever you want and change it accordingly for your occasion.

Here's what our whole book says:

"Dad, we're so glad to be stuck with you .... Because: You are Faster than a Cheetah. Always down to Let it Go. Always stick around for lots of Huggy Kissy. Are a Master Wave Jumper. Always TCB. Forever ready for a game of Tackle. The Absolute Best Sea Monster. We Love You Forever, Vegas, Kane, Cami (+ mommy)."

(some are obviously inside jokes with daddy, but trust us, he's going to LOVE it just as much as we love him!)

Mom also embroidered a little "DAD" heart tattoo on a photo of us and framed it -- just to stick with the theme.


Monday, March 17, 2014

Holidaze: St. Patrick's Day Rainbow Fun


Happy St. Patrick's Day!!! If you're anywhere in our area of the country, we understand if the snow has you confused. BUT it is indeed March and St. Paddy's Day! To celebrate, mom rounded up our favorite rainbow activities, all of which can be done indoors for those in the cold. AND stay tuned for a snow-related rainbow activity on our Facebook page later today!

- Rainbow Cupcakes
- Rainbow Popsicles
- Rainbow Roller Paintings
- Rainbow Scavenger Hunt
- Rainbow Shaving Cream Tub Paint

Friday, March 7, 2014

Your Dough is My Dough: Shamrock Shake Playdough


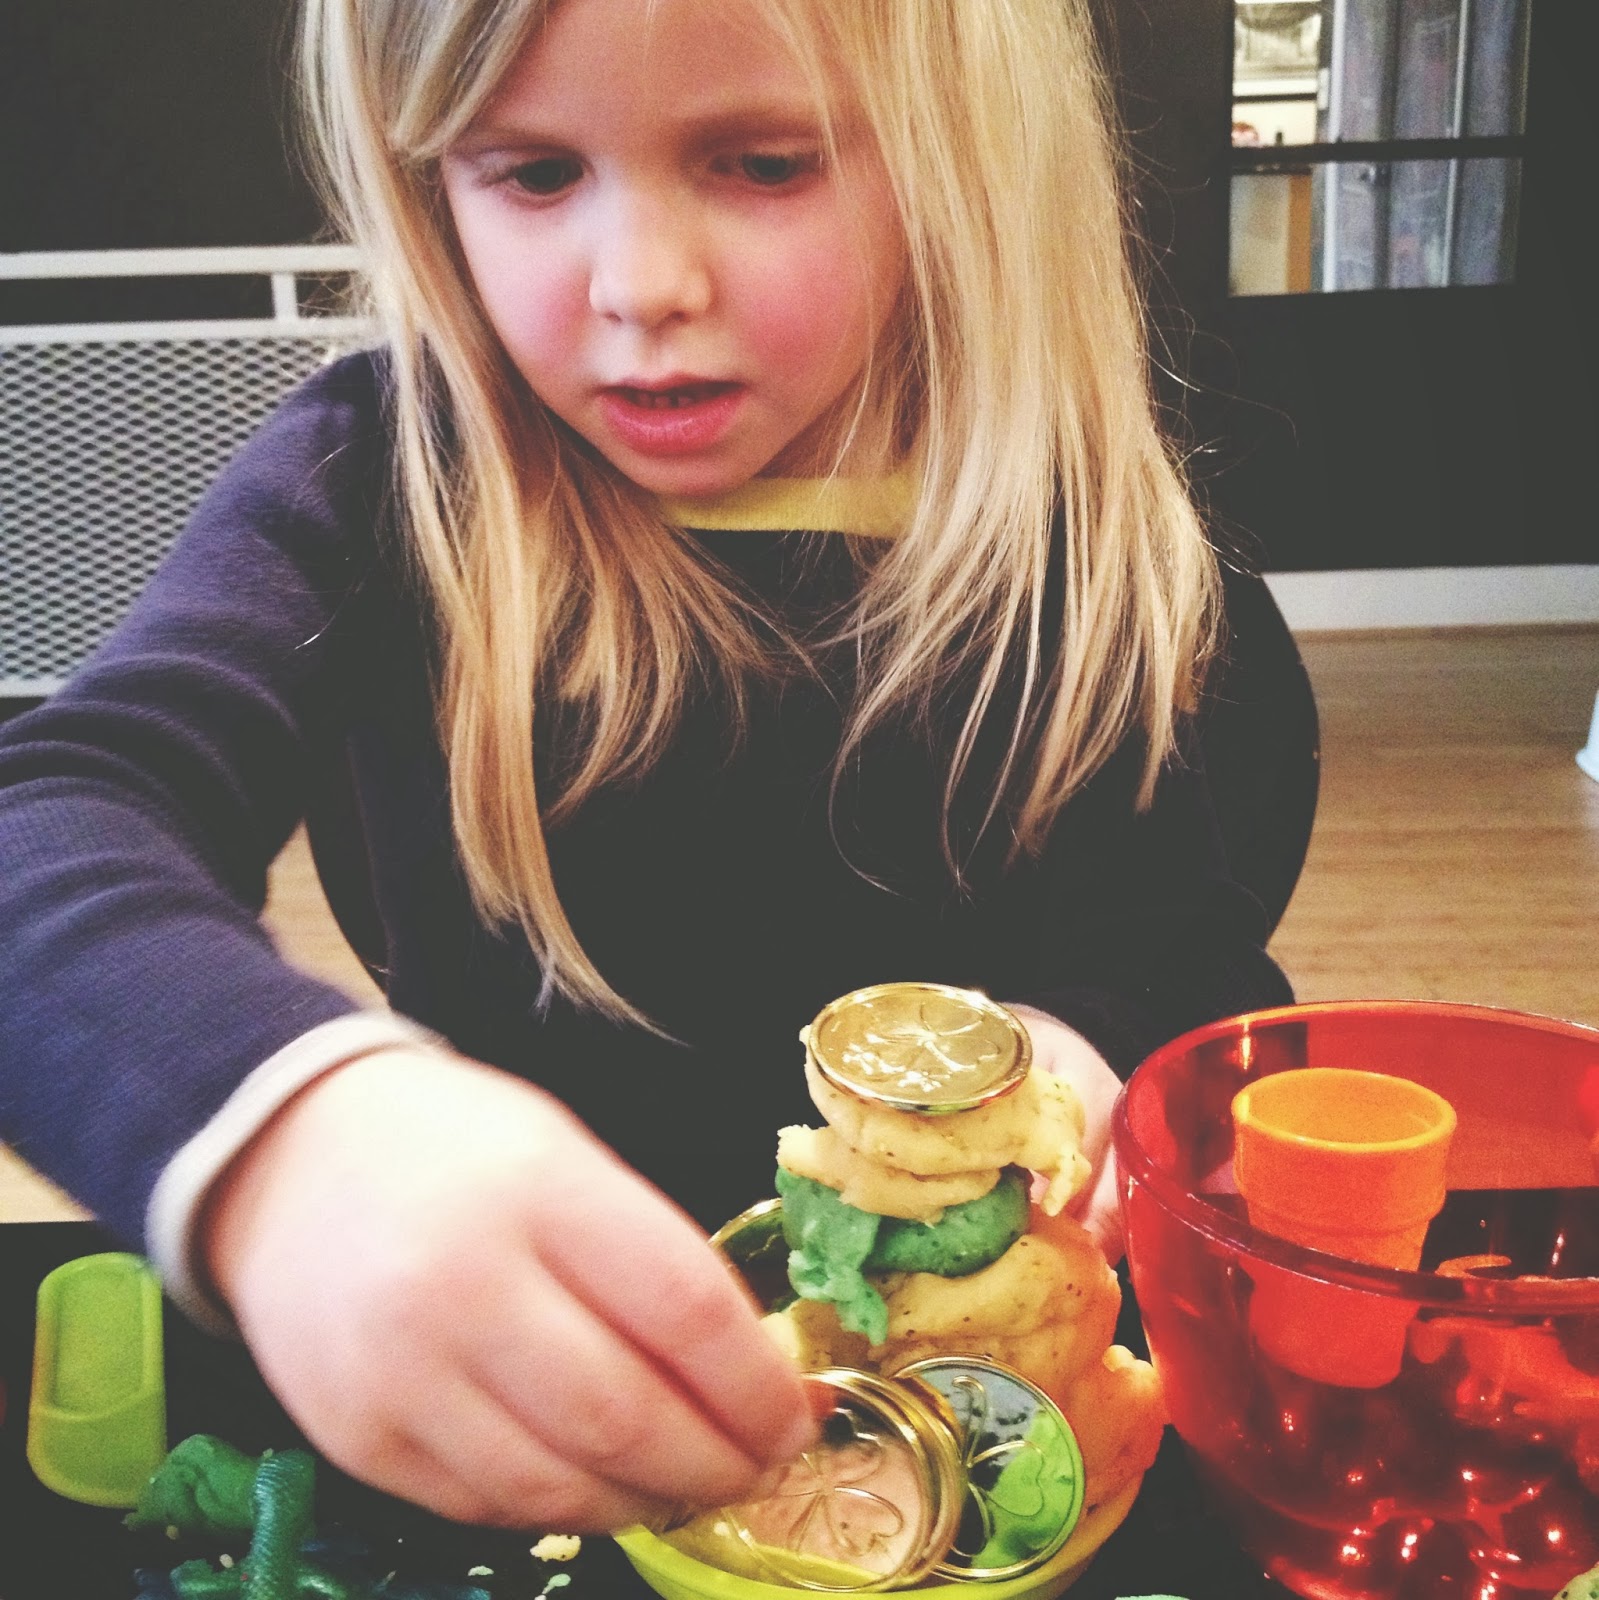
We come from a long line of Irish folk and LOVE us some St. Patrick's Day. I mean, my favorite color is already green, so .... Mom's been talking up something called a shamrock shake lately -- apparently it was one of her favorite holiday treats growing up. Then she mentioned to a friend she was planning on taking us to Old Macdonalds for our first taste and said friend relayed her own experience last year where her kids went into a sugar-induced high followed by a vomitous downer. Mom rethought her plan and came up with this: shamrock shake playdough. All the holiday fun without the tummy rollercoaster. OK, not ALL the fun, but it was still a pretty good time.

Here's the shamrock scoop:


Shamrock Shake Playdough

Ingredients:
- 4 cups flour
- 4 cups water
- 1 cup salt
- 2 tablespoons cooking oil
- 4 teaspoons cream of tartar
- 1/2 - 1 tablespoon of peppermint extract (depending on how strong you want it to smell)
- 1/2 - 1 tablespoon of vanilla extract (same)
- green and yellow food coloring
- green and gold glitter
- gold coins (mom picked up these shamrock ones in the Target dollar bins) or other St. Patty's Day appropriate props (we also used heart cookie cutters to make shamrocks)

Directions:
Combine ingredients through extracts and cook over medium heat, stirring constantly until most of the moisture is absorbed (it will take a bit). Let it cool on some wax paper. Divide the batch into halves and work green and yellow food coloring into the respective halves. Add glitter to each and work it in. 


(mermaids are totally friends with leprachauns)

Friday, December 20, 2013

Holidaze: Our Un-Holiday, Holiday Cookies


A few weeks ago, we went to an awesome chalk mural gathering at Art Yards down by Yards Park. As part of the event, nearby Buzz Bakery set up a cookie decorating station. And we had a blast smearing brightly-colored frosting and sugar on a variety of holiday sugar cookies. We made a whole bunch and really, really wanted to bring some to our teachers. But we don't celebrate Christmas at school and we also have lots of friends who celebrate holidays other than Christmas, so mom promised that we could make a new batch that would be just as tasty, just as brightly colored and holiday neutral.

Once mom was involved, you knew chocolate was going to be as well. Mom found a yummy chocolate cookie shape recipe and we cooked them up on a Sunday afternoon. We had a playdate planned with a friend on Monday and we were excited to decorate those sweet little chocolate woodland animals. Mom made a Target run while we were at school to get the colored sugar and spent a boat load of money on miscellaneous things, but when she got home, she realized she forgot the very thing she went for in the first place. She was in no mood for a second Target run that day, so she turned to the place that offers a solution for everything -- Pinterest -- and found a promising recipe for sparkly colored sugar (it doesn't turn out quite as glittery as Pinterest promises, but whatever does).

We had a blast getting sugared up on our playdate and made enough neon-colored un-holiday, holiday cookies to share with friends and family. I think we've started a new family tradition.


Thursday, October 31, 2013

Artworks: Dia de los Muertos Monoprints


Mom is obsessed with Dia de los Muertos, which falls on November 1st and 2nd, and we were quite happy to jump on board this year given the stronghold we have on Halloween decorations and our interest in all things involving skulls. There are tons of really cool Dia de los Muertos crafts out there, but mom had been wanting to try making monoprints for a while and was trying to think of a way to do both things. Then she remembered No Monsters in My Bed's q-tip printing post from a while back and figured we'd give that a go by making sugar skull prints. We all LOVED it. Mom printed out these coloring sheets for us to reference and sat down with us and made some herself as well. We tried colored paint on white paper and mom also tried black paint on colored paper. Both came out awesome. I'm guessing these will be made into a flag garland soon .... There also may be gems involved.

Here's the DIAlio. You'll need:
- paint
- an old pan or baking sheet
- q-tips
- paper (we used both heavy watercolor and lighter weight paper and each turned out well. the light weight paper will probably look cool strung up into a paper garland because it will move with the air better)
- a brayer or sponge paint brush

Once you've got your supplies:
1. Spread a thin layer of paint onto the back of a pan or baking sheet using the brayer or sponge paint brush. Try to spread the paint until it's translucent -- a thicker paint layer does not print as well.

2. Use the q-tip to draw a sugar skull (or have a parent draw the outline and the kiddos add detail).

3. Press a piece of paper carefully on the design and smooth with your hand.

4. Lift to see your print!

We varied our prints by changing up the type and color of paper and mixing in glitter paint to some of them. Fabulous.


Monday, October 28, 2013

Holidaze: Easy Halloween Bunting


No sooner than we got our store-bought Halloween decorations up, we started back in on mom for more. She's not sure what's going on this year, but we are INTO this holiday (check out our instagrams from this weekend -- an entire family full of vampires, two days in a row. and we haven't even hit actual Halloween yet). Mom's been hard at work on another project (more to come on that soon), so she wanted to set us up with an easy Halloween project we could do ourselves that would serve as a great decoration. This bunting is super simple, but turned out to be really fun and cute to make. Although if you're talking to Kane, you better pretend to be really, really scared of his spooky drawings.

Mom made two stacks of colored paper -- one orange, one white. She traced the outline of the top of a pitcher on one, to form a pumpkin shape. And she "freehand drew," a phrase I use very loosely, two ghost shapes on the other. Then she cut out a big stack of blank pumpkins and ghosts for Kane and I to decorate. We used black oil pastels and markers to draw on them. I favored abstract designs, while Kane went for the spook factor and drew vampire and mummy pumpkins. She strung them all up on black and white baker's twine and, boom, a quick Halloween bunting was made.

To no one's surprise, this little activity only served to further spur on our Halloween decorating obsession. And we also made bats, witches, and tissue paper ghosts. We've still got three days left until the big one is here ... anyone else make great Halloween decorations this year?!